DIY ceiling lights: unique ideas for chandeliers and lighting fixtures
Accessories, textiles and other decor items can be easily changed in accordance with fashion, season and mood. But with chandeliers and lamps it is not so simple: they bought a spectacular expensive model and - for centuries. But if you are one of those who are constantly striving to bring something new and unusual to the interior, we offer to make one of the options for the original ceiling with your own hands.
Feather lampshade decor

Materials, tools:
- paper lampshade;
- paper;
- suspension for the lamp;
- ruler, glue stick, scissors.

 Step 2. Cut the folded paper so that the fold line is in the center. First, cut out the shape of the pen, then the cut is not completely.
 Step 3. As a result, from one sheet of A4 format you get 8 feathers. They need to be separated from each other.
 Step 4. We make the necessary number of such blanks.
 Step 5. Open the lampshade and insert the spacer inside.
 Step 6. Smear feathers with glue at the base on one side and glue to the ceiling.
 Step 7. Evenly glue the plafond with feathers row after row every four centimeters.
 Step 8. We fix the electrician to the internal holder. We fix the suspension and screw in the bulb. The original chandelier is ready!
DIY retro style chandelier lamp
Materials, tools:
- 2 frames for shade;
- decorative braid of three colors;
- knitting hook;
- scissors.
 Step1: We tie a braid to the lower ring of the lampshade, leaving a tail of 5 cm.
 Step 2: Pull the braid over the upper ring from the outside, throwing it through it and stretching the lower ring through the inside. And so we alternate to the next sector. We fix the braid.
 Step 3: Take another braid and repeat the process until the next section. Do not forget to leave a tail at the beginning.
 Step 4: Fill the third sector with the last braid.
 Step 5: Using the hook, we extend the tails on the bottom of the lampshade.
 Spectacular retro style lampshade ready. The only thing left is the insertion of the cartridge and the assembly of the chandelier in random order.

Solar powered garden lights with rope lights
If you have long dreamed of elevating your garden plot in a special way, we suggest constructing a bewitching light installation. Of course, you have to spend a little money, but believe me, the result is worth it.

- three metal tubes 1.2 m long and 2 cm in diameter, with a thread on the end;
- three couplings with a diameter of 2-2.5 cm (sold in a construction hypermarket in the department with sanitary fittings);
- three sunny garden lanterns (sold at garden decor stores);
- three plastic balloons (you can always find in the supermarket in the children's department);
- PVA glue;
- twine or twine (building market or hardware store);
- gloves (if you do not want to get your hands dirty in glue);
- marker to mark the circle on the ball, which will not cover the twine;
- a stencil of thick round paper (you can take disposable dishes, for example, plates with a diameter of 10-12 cm;
- a container for glue, where it will be necessary to soak the twine;
- metallic spray paint for outdoor use;
- scissors;
- hammer.
As for the time, the assembly of the structure itself will take you no more than 15 minutes, and only the process of drying the rope balls takes several days.
Step 1: Using a marker and a stencil, draw a circle at the top of the inflated ball. Step 2: Thoroughly glue the rope with glue. Wrap it randomly in different directions on a ball to make beautiful bindings. In this case, leave the space outlined by the marker free. In no case do not wrap the ball completely - the glass surface must be visible, otherwise the light will not be able to break through the deaf weave. Leave the balls so wrapped to dry for several days.
 Step 3: After the winding is completely dry and solid, blow out the balls. Carefully remove them through the hole.
 Spectacular shades are ready. Rope shades should have holes to put them on the lanterns.
 Step 4: On the other hand, also make small holes. So, a solar cell panel on a garden lamp can easily capture the light of the sun. If your scheme involves the removal of the ceiling in the daytime to recharge the lights, this can not be done.
 Step 5: Paint the shades with spray paint. Pay attention to the marking. The paint should be designed specifically for external work.
 Step 6: Hammer metal pipes into the ground so that the tops are at different heights and there is a distance of 5-10 cm between the pipes.
 Step 7: The base for the fixtures will be a coupling, which must be screwed on top of the pipes.
 Step 8: Remove the solar lights from the legs. Their base must match the size of the coupling.
 Step 9: Put the balls on the solar lights. They will easily let the sun in to recharge the flashlights.
 Solar-powered garden lights, dressed in rope shades, will become a luxurious decoration of the garden.
 Of course, you can leave the solar lanterns and so, but with handcrafted shades they look much more interesting.

Exclusive gift for the photographer: do-it-yourself lamp from slides and cameras
To make such a colorful and unusual lamp, you will need:
- a lamp that can be disassembled into parts to create our lamp;
- negatives or color slides;
- three old cameras;
- cold welding or superglue;
- frames for cardboard slides;
- hole puncher;
- metal ring or ceiling frame;
- metal ring connectors.
 Step 1: First you need to connect 3 cameras. You can use superglue, but it is better to use a more reliable way. Using cold welding, you can firmly and tightly connect the parts. First you need to clean them from dust, degrease and sand the junction with sandpaper. Then prepare the mixture in accordance with the instructions and apply it on the surface of the cameras.
 Step 2: We tighten the cameras with a tourniquet and leave for 15-20 minutes.
 Step 3: We connect the leg from the lamp with the switch, power cord, lampholder to the cameras using cold welding.
 Step 4: Now let's get into the ceiling. Place negatives or color slides in cardboard frames. With a small hole punch, make neat holes in the corners, then connect all the slides into a single canvas with connectors.
 Step 5: Attach the finished canvas to the metal frame from the lampshade of the old lamp.
 Step 6. It remains only to screw an energy-saving light bulb into the ceiling and enjoy the stunning view of a colorful photo-night lamp.

And here is another example of an original lamp with a ceiling from audio cassettes. Real luxury in a room of a true music lover!


DIY lampshade for birch bark lamp
Birch bark is an interesting material for a home-made lamp made of birch bark. In a duet with a coffee table made of birch logs, you will get a harmonious and holistic corner in style.
 Do not peel a living tree for crafts. Birch bark can be found in the forest from fallen branches or at sawmills. Birch bark is highly flammable, therefore, before using it as a lampshade, it is necessary to treat it with a water-based sealant. Moreover, the sealant will save from the appearance of cracks and drying of the bark.
 You can fix the bark over the lamp with a rope or fishing line. To cover the form, the edges of the birch bark can be glued, stitched or gently tied with a rope. The first option will not work if it is planned to use the lamp often at night. Constantly heating, the glue will quickly lose its properties.

DIY ceiling lights
You can see more ideas for a wonderful masterpiece with your own hands in the next photo selection.


Watch the video: Multi-Light Pendant Chandeliers - New Swag Light Ideas - Lamps Plus (January 2025).


-
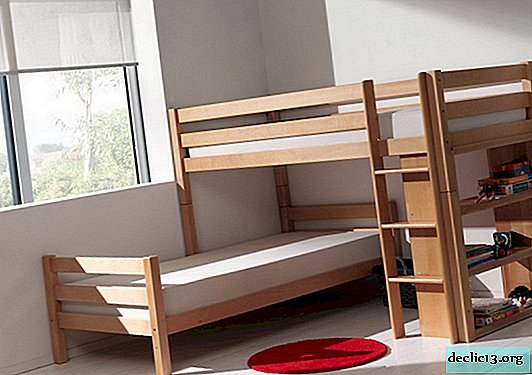
Varieties of bunk corner beds, their place in the interior
In small rooms there is always a shortage of free space, especially if two people live in such rooms at the same time. To solve the problem of saving space, built-in beds are especially popular, but they are ineffective for two kids in a children's room. The corner bunk bed makes it possible to free up space for relaxation and games, and also provides children with separate sleeping areas. ... -
-
-