Tips for planting and caring for Pelargonium Patricia Andrea from experienced gardeners

Among all varieties of pelargonium, tulip-shaped ones occupy a special place - the most decorative and elegant representatives of this species. Today, only about 20 varieties of tulip-shaped pelargonium are available for florists to breed - and Andrea varieties occupy an honorable place among them.
These varieties were one of the first to be bred, and named after the representatives of the female part of the Andrea family - breeders, who gave the world a tulip-like pelargonium.
In the article, we will consider in detail the features of growing Andrea pelargonium on the example of the most common variety Patricia Andrea.
Description
Andrea's Tulip Pelargonium - a product of artificial purposeful selection work. The variety was bred in 1996 in the USA by professional breeders Andrea. Actually, their name is a flower and wears. Plants are interesting in that, unlike ordinary pelargoniums and geraniums, their inflorescences have the shape of small, not fully opened tulips. This plant looks very decorative and attractive.
Among the varieties of pelargonium Andrea, the following can be noted:
- Patricia Andrea (she will be discussed in the article);
- Carmen Andrea;
- Victoria Andrea;
- Lilian Andrea;
- Linea Andrea.
After the variety was introduced to the general public, Andrea Pelargonium immediately attracted general attention. Today, the flower and its few varieties are very popular among gardeners: decorative and unusual plants are valued. Note that this flower is very difficult for breeding, therefore, new varieties of Andrea's pelargonium have not yet been bred.
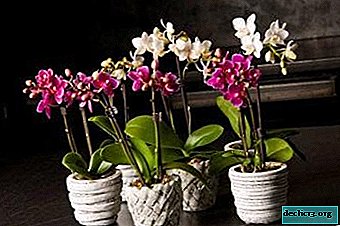
reference. The plant smells wonderful and has healing medicinal properties. Note that Pelargonium essential oil is known for its soothing properties. Also, the aroma of a flower is able to strengthen the immune system and relieve headaches.Photo
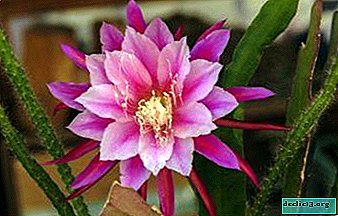
Look at the photo of the flower of Patricia, as the name is translated from English, some gardeners call the plant Patricia, which of course is not very important.


Appearance
The main distinguishing feature of this plant is that the buds of its flowers resemble small tulips, located, moreover, not individually, but collected in lush inflorescences. The shape of the flowers can be elongated, and oval, elongated.
Coloring is very diverse, but pink-raspberry shades prevail. Especially decorative look the flowers of this plant against a background of saturated emerald foliage.
Andrea Pelargonium is not grown in open ground in our climate. This is due to the fact that the plant is thermophilic and has a delicate structure.
Landing
Consider how to properly plant Andrea's pelargonium, and what place in the apartment is best for her.
Lighting and seat selection
This plant loves sunlight, and reacts very painfully to its lack. Therefore in the apartment Andrea's pelargonium pot is recommended to be placed on the sunniest window sill.
In winter, when daylight hours are short, it is important to organize additional lighting for the flower in the evening and morning. Note that if there is enough light for the plant, pelargonium can please even winter flowering.
As for the temperature regime, for the successful development of this flower you need an average temperature of + 21-25 degrees, and in winter a little lower. Besides, it’s important to clean the Andrea pelargonium pot away from batteries and other heating devices in winter. All because she does not tolerate dry air.
Attention. If you notice that the stems stretch out of the flower, become weaker and paler, then pelargonium does not have enough light.Soil features
 In order for Andrea's pelargonium to grow well and bloom magnificently, the following earthen substrate is suitable for it:
- turf land - 2 parts;
- sand - 1 part;
- peat land - 1 part.
You can either prepare this mixture yourself or buy a ready-made substrate for geraniums and pelargonium in the store. It is recommended to put drainage in the form of small expanded clay at the bottom of the pot. This measure will protect the plant from waterlogging of the soil.
Care Rules
When growing this plant, proper care is of particular importance. The fact is that with improper care over time, the plant can degenerate, and from a tulip-shaped plant become ordinary. However, the care requirements are simple, and even a beginner grower will cope with them. Further we will get acquainted with the main points for the care of Andrea's pelargonium.
Watering
The plant needs stable, regular soil moisture. In the summer, Andrea's pelargonium is watered every two days, while not allowing stagnant water in the ground. In winter, watering is carried out less often - 1-2 times a week, however, preventing the substrate from drying out.
Top dressing
Pelargonium Andrea needs additional nutrition, especially during the period of active vegetation - in summer and spring. For feeding, flower growers usually use liquid mineral compositions. So, for spring and early summer, it is recommended to use complexes with nitrogen, potassium and phosphorus. When the flowering of pelargonium begins, it is better to exclude nitrogen from the composition, since it gives a green mass to the detriment of flowering.
Feeding scheme:
- in the spring, with an interval of a couple of weeks, a complex mineral composition is introduced;
- when the first inflorescences appear, nitrogen is excluded, and compounds with phosphorus and potassium are added;
- after flowering, pelargonium is also fed with potassium and phosphorus.
Pruning
 For a decorative and magnificent appearance of pelargonium, it is recommended to pinch the apical shoots. This measure will allow the bushes to grow in breadth and form a larger number of inflorescences.
It is important to remove all dried leaves and buds from the flower in time. Not only do they spoil the appearance of the plant, but even with their presence, pelargonium may refuse to form fresh inflorescences.
If suddenly instead of the characteristic tulip shape ordinary buds appear, immediately remove them. Otherwise, pelargonium will begin to “give out” ordinary inflorescences, will lose its species characteristics and decorative qualities.
Tip. It must be borne in mind that this plant reacts extremely painfully to a change in its location. It is not recommended not only to transplant a flower often, but even to turn its pot around its axis once again.Many gardeners have noticed that even if you turn the pot the other side to the light, pelargonium may begin to drop its buds.
Diseases and Pests
Pelargonium Andrea, like other domestic plants, did not escape the threat of disease and pest damage. We learn what diseases and insects are dangerous for this plant first of all.
Of the diseases for Andrea's pelargonium, the most dangerous are:
- rust;
- gray rot.
Of the pests, the following insects can be noted:
- spider mite;
- whitefly;
- mealybug.
To understand that the plant is sick, usually a quick cursory examination:
- in case of defeat of pelargonium by rust, its leaves will acquire first white, then brown plaque;
- gray rot is recognized by the characteristic fluffy gray spots on the underside of the foliage;
- pests impersonate perforation on leaves, withering a plant, drying its buds;
- if pelargonium freezes, its leaves acquire a reddish tint.
Breeding
Pelargonium Andrea can propagate both by seed and with the help of cuttings. We give instructions on both options.
Seminal
 Please note that this method of breeding Andrea's pelargonium is quite complicated, and a beginner gardener may not be able to. The technology is as follows:
- Plant seeds are lightly wiped with fine sandpaper to improve germination.
- Then the seeds must be soaked:
- in the root stimulator;
- in potassium permanganate;
- in plain water.
The last soak lasts about three hours, the first two by the hour.
- Seeds are planted in the soil at a distance of 5 cm from each other.
- The box should be covered with polyethylene with holes made in it to create greenhouse conditions.
- The soil does not need to be watered, but sprayed with water from a spray bottle: and after about a couple of weeks the first shoots appear.
- When a pair of real leaves appear on the sprouts, they can be dived into separate containers.
Important! Do not expect the sprouts to become taller. In this case, their roots underground may intertwine, and then it will be difficult to separate the plants into separate containers. Moreover, injuries received by the roots during a dive will affect the further development of plants in a negative direction.
Cuttings
 A simpler and more convenient way of propagating pelargonium is also suitable for beginners. Cutting Technology:
- Cuttings are cut in late August from the tops of mother plants.
- Immediately after the cut, the cuttings should be placed in water. Note that their roots grow quite quickly.
- After the appearance of the roots, the cuttings are planted in prepared moist and nutritious soil with the same composition as in adult plants.
- Tanks with young plants must be placed in a well-lit and warm place, so that they take root better and grow faster.
Conclusion
We met such an amazing flower as Andrea Pelargonium. This representative of the type of tulip-shaped pelargonium, along with unique decorative features is unpretentious in nature, however, she loves warmth and good care. Growing this flower is also possible for a novice gardener: it is important only to follow simple recommendations regarding the placement of the plant and its care.
Watch the video: Geranium, Petunia and Californian Poppy (May 2024).
-
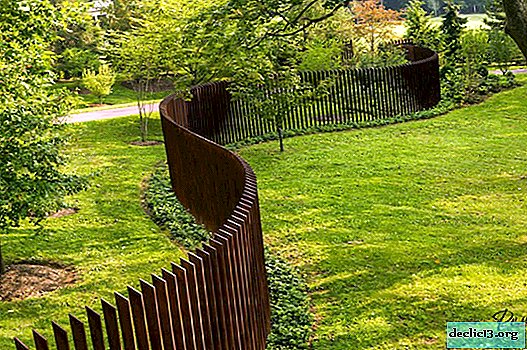
The fence must not only protect, but also be beautiful
If you are the owner of a beautiful house with a chic garden plot, then the fence enclosing your territory must be beautiful, especially since there are no trifles in the garden at all. And such an object as a fence is very noticeable and not at all a trifle. Of course, the fence primarily has a protective function, providing safety and comfort - you can not argue with that. ... -
-

-