Tips for saving and growing roots of the Phalaenopsis orchid

Orchid is a rather capricious plant. Due to improper care, your favorite phalaenopsis may remain completely without roots: they will rot or dry out, and the plant will begin to fade and lose leaves.
And what to do in such a situation? Do not rush to bring the flower to the trash and throw it away: it will still be possible to save it. How to reanimate phalaenopsis and build up wilted roots?
You will receive answers to these and other questions from this article.
What does it mean?
We will understand what is meant by "phalaenopsis without roots."
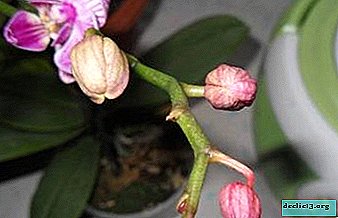
This plant is very tenacious, so for a long time it may not betray that something is wrong with it. But adverse conditions are reflected on the roots: they dry out, rot and die.If you have a suspicion that something is wrong with phalaenopsis, for example, the leaves turn yellow, become sluggish or do not grow new for a long time, it is best to take it out of the pot and examine if the roots are intact.
 Living roots should be green, white or brownish. (due to lack of light), but at the same time solid and dense to the touch. But rotten roots will squeeze under the fingers. They will become hollow, sometimes slimy. When pressed, moisture will be released, and in a running situation, they will begin to creep under your fingers, exposing the semblance of a thread.
If you observe such a picture - the roots can no longer be saved. The plant literally breaks up into parts: the bottom dies, and from the upper part there are at best several leaves near the growth point. This is what is called "phalaenopsis without roots." It remains only to cut off everything rotten and dried up, and begin resuscitation.
Why is this happening?
- Overflow. Most often, the roots die due to overflow. If the substrate is wet all the time, then velamen - the tissue that covers the roots of orchids and absorbs moisture well - begins to rot. Gradually, this rotting spreads to all roots. Moreover, this process can develop both slowly and instantly.
- Lack of light. Overflow with a lack of light. This is an even more dangerous situation, because with insufficient lighting the plant “falls asleep” and practically ceases to absorb moisture.
- Unsuitable substrate. Sometimes they try to grow phalaenopsis in ordinary soil - in this case, the roots lose access to air and rot.An experiment with growing in a hydrogel or sphagnum may also be detrimental if you do not know how to calculate watering.
- Root fracture when transplanting or transporting. Important: you cannot cut the broken roots, so you reduce the chances of the flower to survive.
- Lack of moisture and heat. This combination kills the roots of the plant by drying them.
- Hard and saline water - it negatively affects phalaenopsis in general and the root system in particular.
- Plant infection. Bacterial or fungal infection.
Most often, phalaenopsis dies not because of a lack of care, but because of excessive care. Reduce watering, do not carry the orchid from place to place in search of a warmer corner - and you will not need any resuscitation.
What is the danger to the flower?
For the most part, orchids are epiphytes. It means that orchids receive all the nutrients not from the ground, but from air and water. The substances necessary for growth are absorbed through the roots. Many of the species (including phalaenopsis) and photosynthesis are carried out through the roots, which is why they are planted in transparent pots. So an orchid without roots will simply die, deprived of the opportunity to "eat" and grow.
Is it possible to save?
 Yes, saving a flower is possible. This is one of the main mistakes of beginning gardeners: to bury an orchid alive when it still has a chance of life. Even if the roots are completely rotted, it can still be saved, and with high probability!
The question is different: resuscitation of phalaenopsis without roots - the process is very quick. As a rule, it takes from several months to a year, and no one will give you a 100% guarantee that the flower will take root.
Therefore, before resuscitation, it is worth weighing all the pros and cons. But trying to save your favorite orchid is still worth it.
In some forums, you can sell a damaged flower if it is rare or beautifully bloomed.For some, this is the only way to buy an expensive plant, but someone just likes to give orchids a second chance.
What do you need?
How to grow orchid roots? First, follow the general procedures.
- Take out and wash the orchid from the substrate. If the roots are rotten - you need to dry it for several hours.
- Cut off all the rot and dry places. Do not be afraid to cut "live", in this situation it is better to overdo it. If there remains at least a piece infected with rot, it will go further. Even if in the end you have one growth point with leaves, it’s not scary. Tip: sanitize the scissors before pruning by calcining them or dipping them in alcohol. Repeat the procedure after each new cut.
- Disinfect slice sites. To do this, use crushed coal, cinnamon or brilliant green. Alcohol-containing drugs are undesirable: they will burn an already weak plant.
- Treat the plant with a growth regulator: Epin or Zircon.
Resuscitation will be successful only when phalaenopsis receives enough light. If it’s winter in the yard, you can’t do without phytolamps.
How to root a plant?
Resuscitation of phalaenopsis is possible both in the greenhouse and in the open air. What to prefer? Look at the condition of the plant. If the roots are almost gone - only the greenhouse. If a couple of roots or large stumps are in place, normal turgor of leaves, then you can try without it.
In the greenhouse
- Prepare or make your own greenhouse. It can be made from:
 plastic box;
- bottles;
- an aquarium;
- ordinary plastic bag with clasp.
- Expanded clay is poured into the container, and a slightly moist (but not wet!) moss sphagnum is laid on it. It is necessary to take this particular type of moss - because of its bactericidal and disinfectant properties. Phalaenopsis is laid on top of the moss.
- Adjust the lighting: it should be both plentiful and scattered.
- Keep the temperature between +22 and +25 ° C. When it is lowered, the plant will not grow new roots, but mold will grow abundantly. And if the temperature is higher, the phalaenopsis will burn itself and begin to evaporate moisture, instead of absorbing and growing it.
- Ventilate the greenhouse once a day.. This is best done in the evening or at night. In winter, 20 minutes will be enough, but in summer you can leave the greenhouse open until the morning.
- Check substrate. From time to time, see if there are any areas of contact with moss that have darkened, water-filled areas. If there are any - phalaenopsis needs to be dried outside the greenhouse, and then turned to the other side.
- Every 10-20 days, feed. It is best to take micronutrient iron chelate.
- Keep an eye on the leaves. To maintain the leaves, it is worth rubbing them with a solution of honey or sugar (1 teaspoon per 1 liter of water). Fertilizer is added to the same water.
 plastic box;
Without a greenhouse
There are many such options.
Alternating soaking with drying
- Cook:
 a transparent container in which the base of the orchid fits freely;
- solution of 1 liter standing water and 1 tsp sugar, honey or glucose.
- Place the plant in a container, pouring a warm (24-26 ° C) solution so that the base is immersed in a liquid for a couple of centimeters.
- Soak for 4 hours, then drain and dry for 20 hours.
 a transparent container in which the base of the orchid fits freely;
The procedure is repeated until the root buds appear.
Upstroke
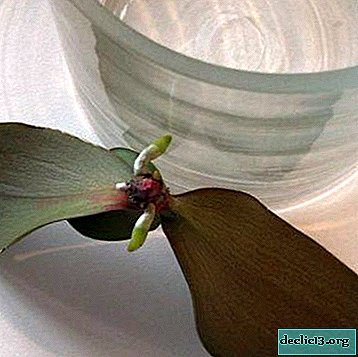 Spread the leaves and place them in a cropped bottle upside down.
- Fill 1/3 of the container with crushed charcoal water.
- Spray the remains of roots or the basis daily with water with a solution of succinic acid or vitamin B.
- Use a root growth stimulator periodically.
 Spread the leaves and place them in a cropped bottle upside down.
The advantage of this method is that it allows you to save whole leaves.
In this video we will look at the way to build up the phalaenopsis roots.
In water
 This method involves deep immersion of the plant in solution., which must be changed once a week. The basis of the solution is warm filtered water, Kornevin, iron chelate, honey or sugar are used to accelerate.
But without drying, the method is not reliable: only 10% of the plants appear roots, and not all of them later adapt to growth in a normal substrate.
Watch a video about building orchid roots in water.
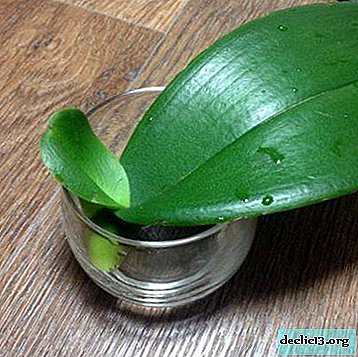
Above the water
Building over water is an effective way for beginners.
 Prepare a clear jar and boiled cool water.
- Place the plant above the water so that it does not touch it.
- Place the vessel in a well-ventilated and warm place (at least 23 ° C).
- Wipe orchid leaves periodically with succinic acid solution.
- Make sure that the water does not evaporate completely, top up it.
 Prepare a clear jar and boiled cool water.
After 2 months, the roots will grow significantly.
In this video, we will consider the extension of orchid roots over water.
Is it possible to speed up the resuscitation process?
All resuscitation methods are quite lengthy. To stimulate the rapid development of the root system, use:
- A solution of succinic acid at the rate of 4 tablets per 1 liter. water - they are rubbed with leaves or mixed into water.
- Vitamin cocktail: one ampoule of vitamin B1, B6 and B12 per 1 liter. water. Only that part of the orchid is lowered into the solution, from where the roots will grow, they are left this way overnight.
- Feeding with glucose, honey - daily.
- Feeding with iron chelate - every 2-3 days.
- Fertilizers with potassium and phosphorus - 1 time in 20 days.
When to plant on the ground?
 As soon as the roots grow by 3-5 mm, phalaenopsis can be transplanted into a substrate. But the pot must be taken very small, not more than 8 cm, so that the plant can absorb moisture and dry quickly.
Use a peat pot for these purposes. Then, with further root growth, a transplant is not needed, just rearrange it in a new container and add the substrate.
After the roots reach a length of about 7-8 cm, the orchid should be transplanted again, in a larger pot. So that the plant does not hang out, after the final transplant for a month, fix it on a backup.
Follow-up care
And now the plant grew roots and gained turgor. But you should not relax: after greenhouse conditions, phalaenopsis needs to be accustomed to the dry air of the room. To do this, organize a new greenhouse: take a transparent bag or the bottom of the bottle. Put it on the plant for 5-6 hours a day so that to the bottom of the greenhouse from the ends of the leaves is 10 cm. After a couple of weeks of this procedure, the orchid is fully adapted.
If you do everything according to the instructions, the orchid will begin to recover quickly.. And soon it will be difficult to say from a flowering luxurious plant that not so long ago this phalaenopsis died completely devoid of roots!
Watch the video: How to save a Phalaenopsis orchid with no or with few roots plus cutting the stem (November 2024).


-
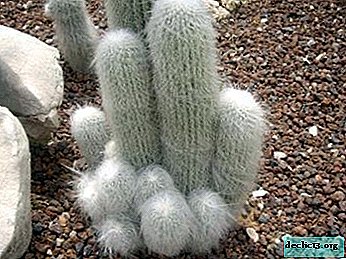
Photos and names of fluffy cacti. Features of the cultivation and maintenance of shaggy succulents
Cactus is a plant that has already been loved by many gardeners. Its popularity is provided by a variety of forms, unpretentiousness in leaving and colorful flowers which appear not so often. Fluffy cacti, which are sometimes also called hairy, occupy a special place in this family. In the article we will tell you what the distinctive features of fluffy cacti are and how to care for them, what species are and what they are called, and also show photos of these beautiful unpretentious plants that can be purchased both for home and for the workplace. ... -

-
-